Japan Airport eSIM (2026): Where to Buy One at Narita and Haneda After You Land
Disclosure: This article contains affiliate links. If you buy through them, we may earn a small commission at no extra cost to you. We only recommend services we believe are genuinely useful for travelers to Japan.
Short answer:
- Yes, you can buy a Japan airport eSIM after you land, and there are two ways to do it at Narita and Haneda.
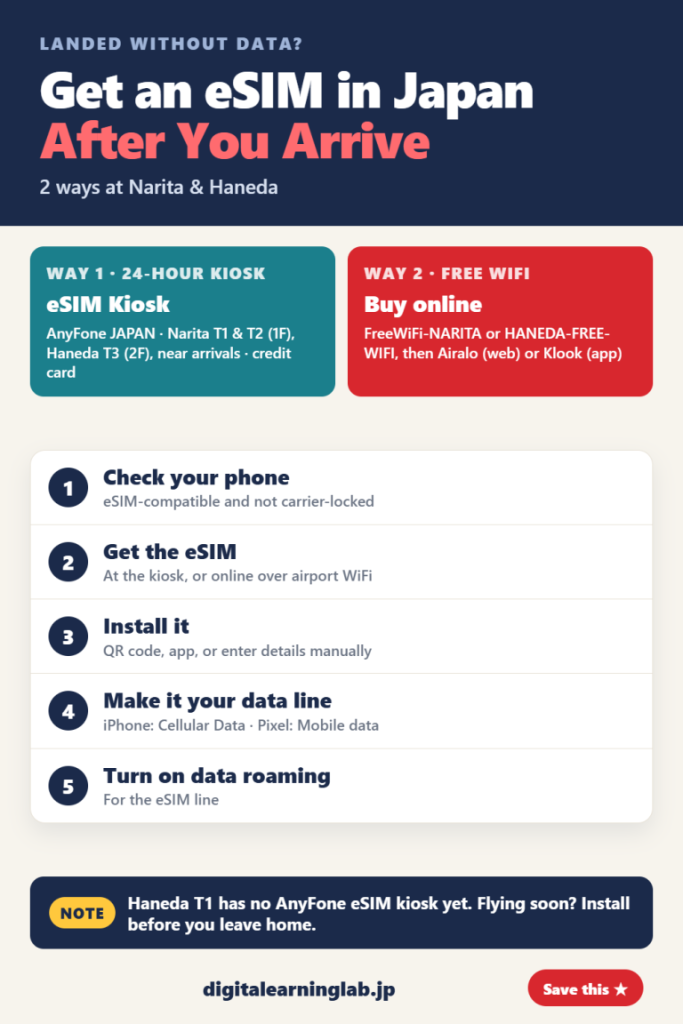
- Airport eSIM kiosk: AnyFone JAPAN runs 24-hour eSIM kiosks at Narita Terminals 1 and 2 and Haneda Terminal 3, near the arrivals areas.
- Online over free WiFi: join “FreeWiFi-NARITA” or “HANEDA-FREE-WIFI” and buy a plan from an eSIM company’s website or app.
- Haven’t flown yet? Buy and install before you leave home, so there’s less to do when you land.
Forgot to sort out your eSIM before the flight? You still have options at the airport. This Japan airport eSIM guide covers both of them for Narita and Haneda, terminal by terminal, then walks through the phone settings you need either way. Everything here comes from the official pages of the airports, the eSIM companies, Apple and Google.
Can you buy an eSIM at a Japan airport?
Yes, at Narita and Haneda, the two airports this guide covers. One route is an eSIM kiosk in the arrivals area, where you buy the eSIM in person with a credit card. The other route needs nothing but the airport’s free WiFi: you buy a plan online and install it on the spot. Airalo, for one, says you can install its eSIM whenever you like as long as you have a stable internet connection.
One thing to know: the airports’ own websites don’t mention eSIM on their rental and SIM counter pages. The kiosks below are listed on the operator’s website, so it’s worth checking that page shortly before you fly.
Japan airport eSIM options by terminal
Where AnyFone lists no eSIM kiosk, you can still buy online over the terminal’s free WiFi.
| Terminal | AnyFone eSIM kiosk | Free WiFi for buying online |
|---|---|---|
| Narita Terminal 1 | 1F, 24 hours | FreeWiFi-NARITA |
| Narita Terminal 2 | 1F, 24 hours | FreeWiFi-NARITA |
| Narita Terminal 3 | None listed on AnyFone’s website | FreeWiFi-NARITA |
| Haneda Terminal 1 | No eSIM kiosk listed. AnyFone’s website shows a prepaid SIM vending machine on B1F | HANEDA-FREE-WIFI |
| Haneda Terminal 2 | None listed on AnyFone’s website | HANEDA-FREE-WIFI |
| Haneda Terminal 3 | 2F, 24 hours | HANEDA-FREE-WIFI |
Kiosk locations are from AnyFone JAPAN’s website and WiFi names from the airports’ websites, checked in September and October 2026.
Before you start: check your phone
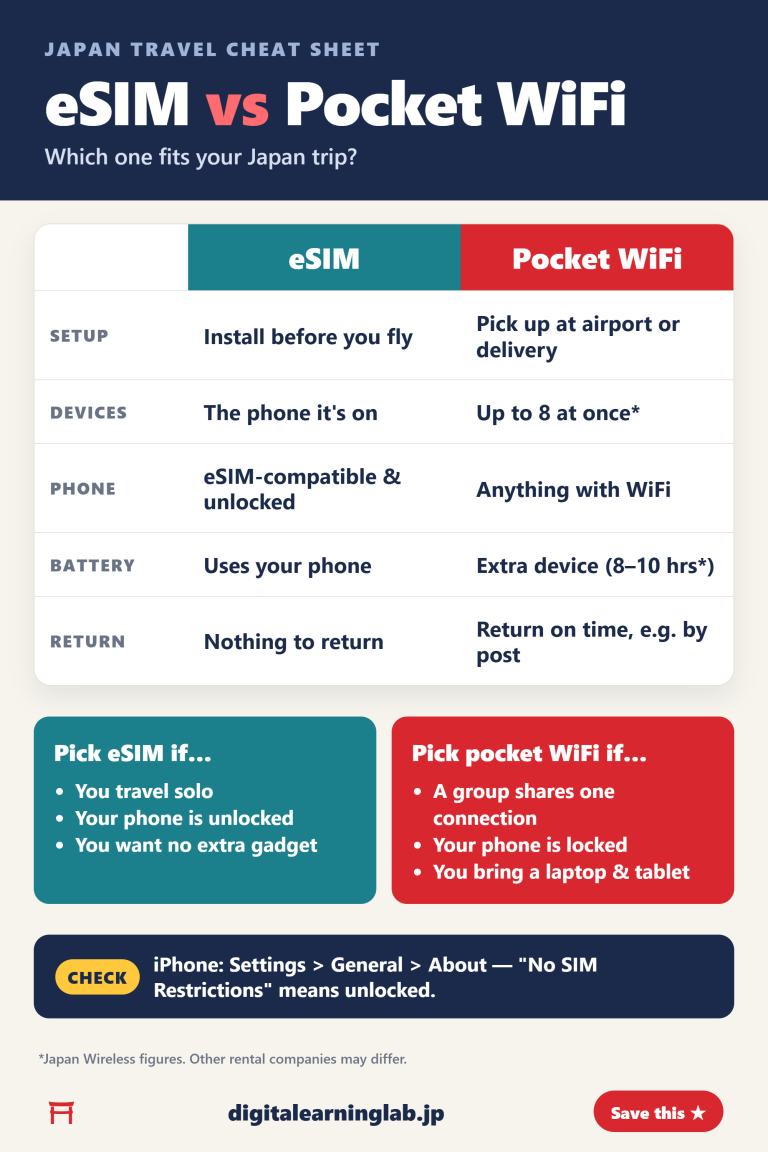
An eSIM only works on a phone that supports eSIM and isn’t locked to a carrier. On iPhone, Apple lists the iPhone XS, iPhone XS Max, iPhone XR and later models. To check the lock, go to Settings > General > About. If “No SIM Restrictions” appears next to Carrier Lock, your iPhone is unlocked. On Android, check with your phone’s maker.
If your phone fails either check, rent a pocket WiFi at the airport instead. Our eSIM vs pocket WiFi guide compares the two.
Option 1: Buy at an airport eSIM kiosk
AnyFone JAPAN describes its machines as an “eSIM Sales & WiFi Rental Self-Service Kiosk”. They are open 24 hours and take credit cards. According to AnyFone’s website, you’ll find them here:
- Narita Terminal 1 (1F): just steps from the central entrance of the arrival floor.
- Narita Terminal 2 (1F): a few steps from the middle of the international arrivals area.
- Haneda Terminal 3 (2F): right at the international arrivals gate. AnyFone says to look for the large maiko graphic. Its store on the same floor is open 6:00 to 23:00.
AnyFone’s store pages don’t list kiosk prices or plans, so compare what the kiosk offers with the online plans below before you pay. If you land at Haneda Terminal 1, note that AnyFone’s vending machine on B1F sells physical SIM cards only for now. The company says it plans to add eSIM later.
Option 2: Buy online using the airport’s free WiFi
This route works at any terminal with free WiFi, and it lets you pick from the full range of plans each company sells.
Connect to the free WiFi
At Narita, the free WiFi covers every terminal and the terminal shuttle buses. Turn WiFi on in your Settings and pick “FreeWiFi-NARITA”. A connection screen opens by itself and asks you to agree to the Terms and Conditions.
At Haneda, wireless internet is available in Terminals 1, 2 and 3. Select “HANEDA-FREE-WIFI”, open your web browser and follow the on-screen instructions. Haneda notes that the WiFi can’t be used inside shops (lounges are the exception) and that it may be hard to connect in certain areas, so move to another spot if the signal keeps dropping.
Buy a Japan eSIM plan
Airalo sells Japan plans on its website. When we checked in September 2026, its unlimited Japan packages ranged from ¥1,850 for 3 days to ¥11,100 for 30 days, with SoftBank listed as the main network. Airalo also says that in many cases you can top up the same eSIM later.
Klook shows its Japan eSIM on the website, but you finish the purchase in the Klook app. Plans run from 1 to 30 days, with “data per day” or “data in total” options, and Klook lists hotspot sharing as available. You’ll be downloading an app over airport WiFi, so allow a few extra minutes.
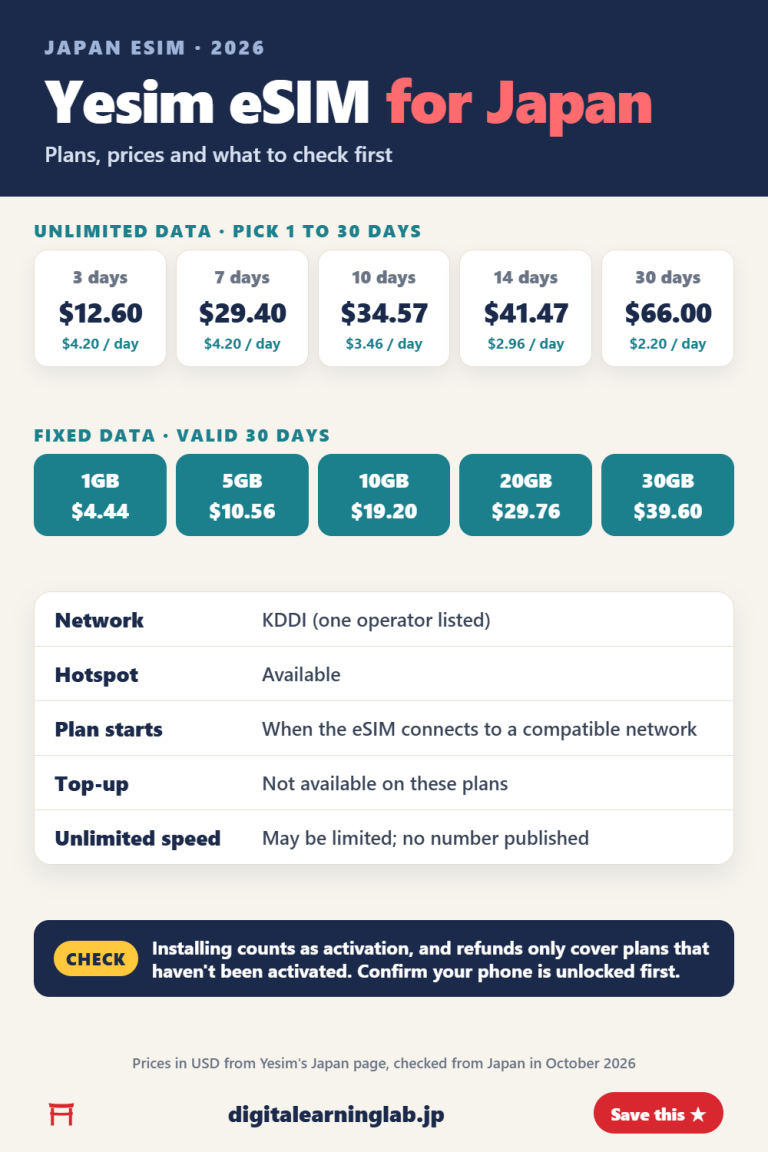
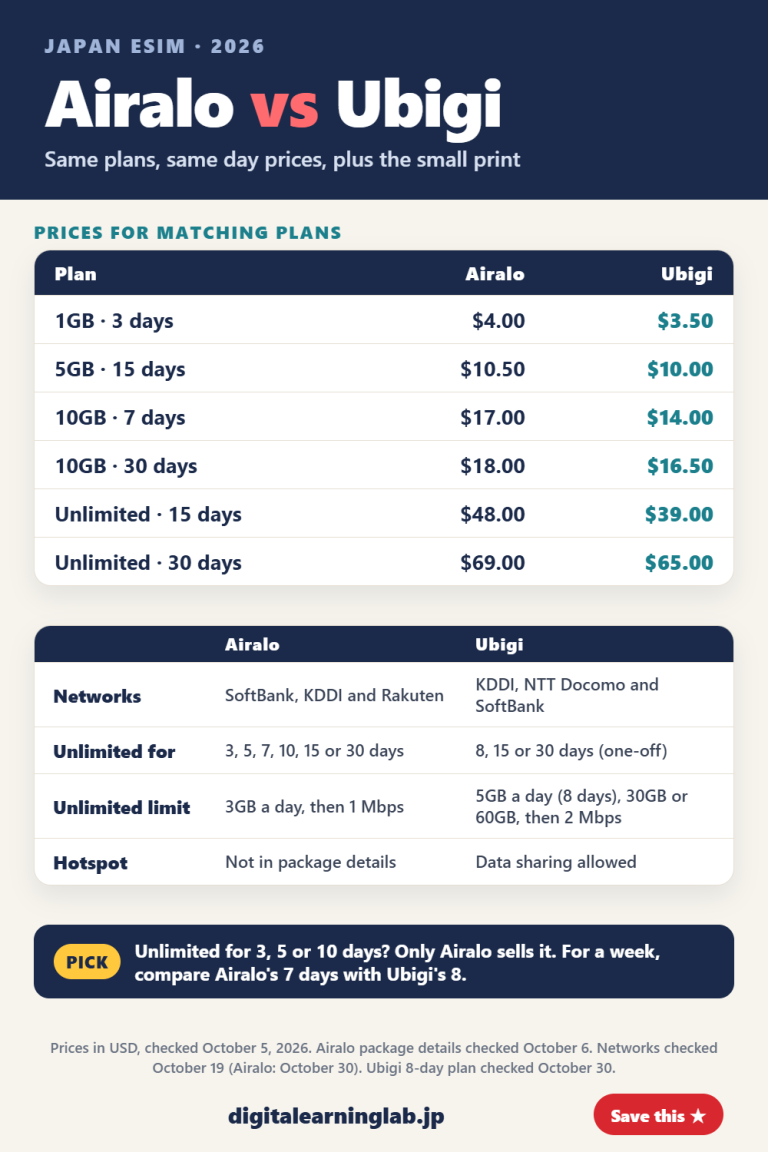
Prices change, so check the current plans before you pay. If you’re still choosing, our best eSIM for Japan comparison covers Airalo, Ubigi and Klook side by side. For Airalo and Ubigi alone, our Airalo vs Ubigi comparison lines up six plans that both companies sell.
Also possible: pre-order and pick up at the airport
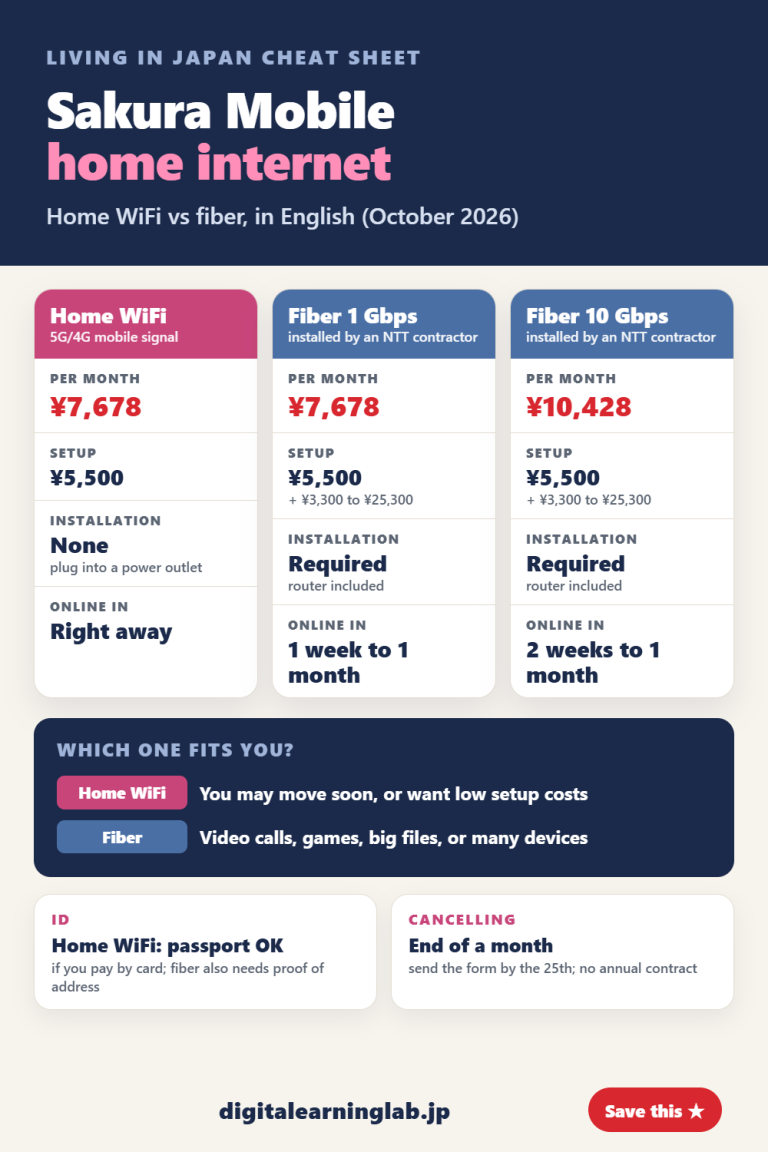
Sakura Mobile works the other way round. You order online, then show your passport at an airport counter to receive your SIM or eSIM QR code. Its airport counters are at Narita Terminals 1, 2 and 3 and Haneda Terminals 2 and 3. Counter hours vary, and Sakura Mobile asks you to check them, so look them up before you fly.
Kiosk or online: which should you use?
I’d head for the kiosk if you land at Narita Terminal 1 or 2 or Haneda Terminal 3 and just want to be online before you reach the train. It’s open around the clock and sits in or near the arrivals area. Buying online means downloading pages (or the Klook app) over airport WiFi, but you can see every plan and price before you pay, which the kiosk’s web page doesn’t show in advance.
Setting up the eSIM on your phone
However you buy it, your phone needs the same few settings. Stay on the airport WiFi while you install.
Install the eSIM
Your eSIM company will give you a way to install it: a QR code, its own app, or details you type in by hand. Klook supports in-app activation, scanning a QR code, or entering the SM-DP+ details manually.
On iPhone: scan the QR code with the Camera app, tap the “Cellular Plan Detected” notice, then tap Add eSIM. To type the details in yourself, go to Settings > Cellular (called Mobile Data in some regions) > Add Cellular Plan > Enter Details Manually.
On Google Pixel: go to Settings > Network & internet > SIMs > Add SIM > Set up an eSIM, then follow the prompts. Google notes that the process can differ slightly depending on the carrier.
Make it your data line
If your home SIM is still on, tell your phone which line to use for data. On iPhone, open Settings, tap Cellular, then Cellular Data, and select your travel eSIM. On Pixel, go to Settings > Network & internet > SIMs and, under “Your primary SIMs”, tap Mobile data and pick the eSIM. Only one SIM can be the default for data. Apple points out that your home line might still charge roaming fees, so check with your home carrier if you keep it switched on.
Turn on data roaming
Klook tells travelers to switch on data roaming at their destination to start using the eSIM. On iPhone, go to Settings > Cellular, tap the eSIM line, tap Cellular Data Options and turn on Data Roaming. On Pixel, the Roaming setting is under Settings > Network & internet > SIMs. Once it connects, you can leave the airport WiFi behind.
Our step-by-step eSIM setup guide has more detail on each screen.
Landing late or flying soon?
If you arrive late at night, the 24-hour kiosks at Narita Terminals 1 and 2 and Haneda Terminal 3 are the ones to aim for, and buying online doesn’t depend on any counter being open. The rental counters keep fixed hours. Narita says many of its rental counters are open from 7:00 to 21:00.
If your flight is still days away, buying at home is the calmer option. With Klook, usage and validity only start once the eSIM connects to an overseas network, and Ubigi’s Smartstart begins your plan when you arrive, so installing early doesn’t use up days with those two.
Frequently asked questions
Can I buy an eSIM at Narita or Haneda Airport?
Yes. AnyFone JAPAN lists 24-hour eSIM kiosks at Narita Terminal 1 (1F), Narita Terminal 2 (1F) and Haneda Terminal 3 (2F), near the arrivals areas. You can also buy one online while connected to the airport’s free WiFi.
Is there an eSIM kiosk at Haneda Terminal 1?
Not from AnyFone at the moment. Its vending machine on B1F of Terminal 1 sells physical SIM cards, and the company says it plans to add eSIM later. The free WiFi route works in Terminals 1, 2 and 3.
Is there an eSIM kiosk at Narita Terminal 3?
AnyFone JAPAN’s website doesn’t list one. Its Narita kiosks are at Terminals 1 and 2. At Terminal 3 you can still buy an eSIM online, because “FreeWiFi-NARITA” covers every terminal.
What is the free WiFi called at Narita and Haneda?
At Narita it’s “FreeWiFi-NARITA”, available in every terminal and on the terminal shuttle buses. At Haneda it’s “HANEDA-FREE-WIFI”, available in Terminals 1, 2 and 3.
Will my eSIM plan start as soon as I buy it?
It depends on the company. Klook says usage and validity start only when the eSIM connects to an overseas network. Ubigi’s Smartstart starts the plan when you arrive at your destination.
My phone is locked. What can I do?
Apple says an iPhone locked to a carrier can’t be used with another carrier abroad. On Android, check with your phone’s maker. If your phone is locked, rent a pocket WiFi instead. Narita and Haneda both have rental counters.
Final thoughts
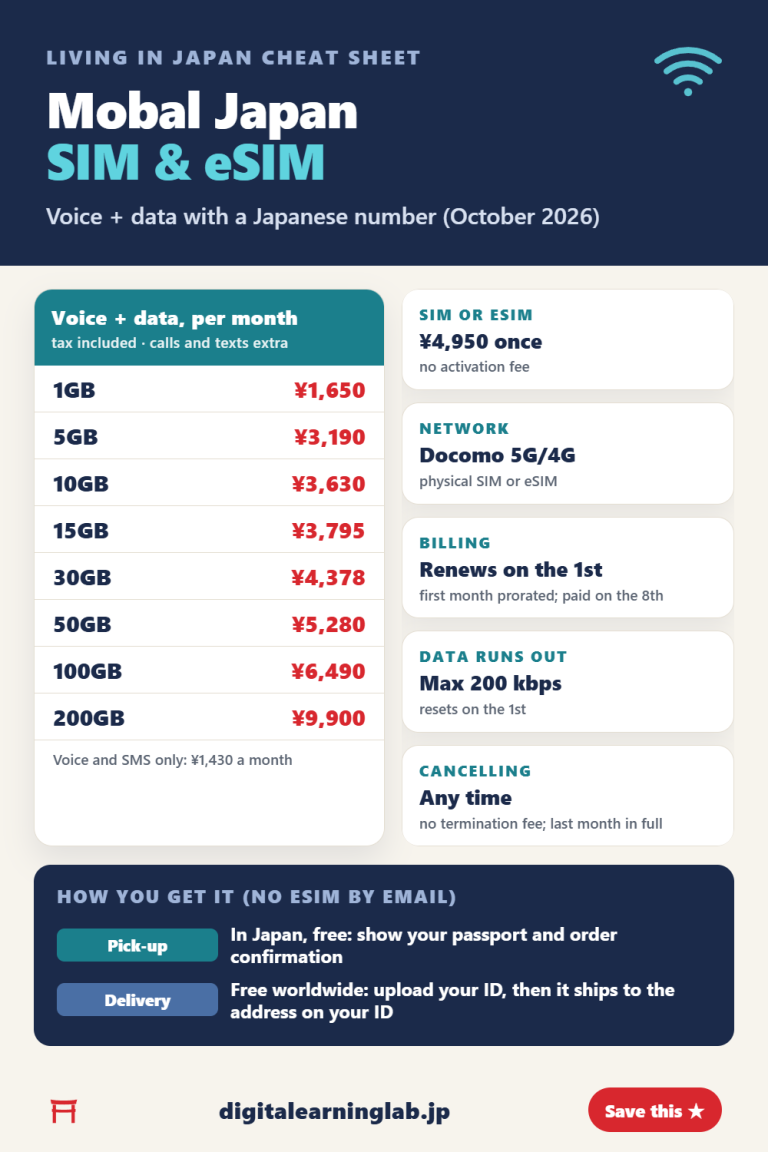
Landing without an eSIM is easy to fix, and there are two ways to get a Japan airport eSIM: walk to a 24-hour kiosk near arrivals, or join the airport WiFi and buy a plan online, then set it as your data line and turn on roaming. Once you’re connected, our Narita and Haneda to Tokyo guide will get you into the city. If you’re moving to Japan to study or work rather than visiting, see our Mobal vs Sakura Mobile comparison of monthly plans that come with a Japanese phone number.
Sources: AnyFone JAPAN: Narita Airport stores; AnyFone JAPAN: Haneda Airport store; AnyFone JAPAN: Haneda Terminal 1 vending machine; Sakura Mobile: pickup and return; Narita Airport: Wi-Fi / Power outlet spaces; Narita Airport: rental and SIM counters; Haneda Airport: free wireless LAN; Haneda Airport: mobile phone rental; Airalo Japan eSIM; Klook Japan eSIM; Ubigi Japan plans; Apple: Use eSIM while traveling internationally; Apple: Set up eSIM on iPhone; Apple: Cellular data roaming options; Google Pixel: Set up a new eSIM; Google Pixel: Connect to mobile networks. Information checked September and October 2026.