
Disclosure: This article contains affiliate links. If you buy through them, we may earn a small commission at no extra cost to you. We only recommend services we believe are genuinely useful for travelers to Japan.
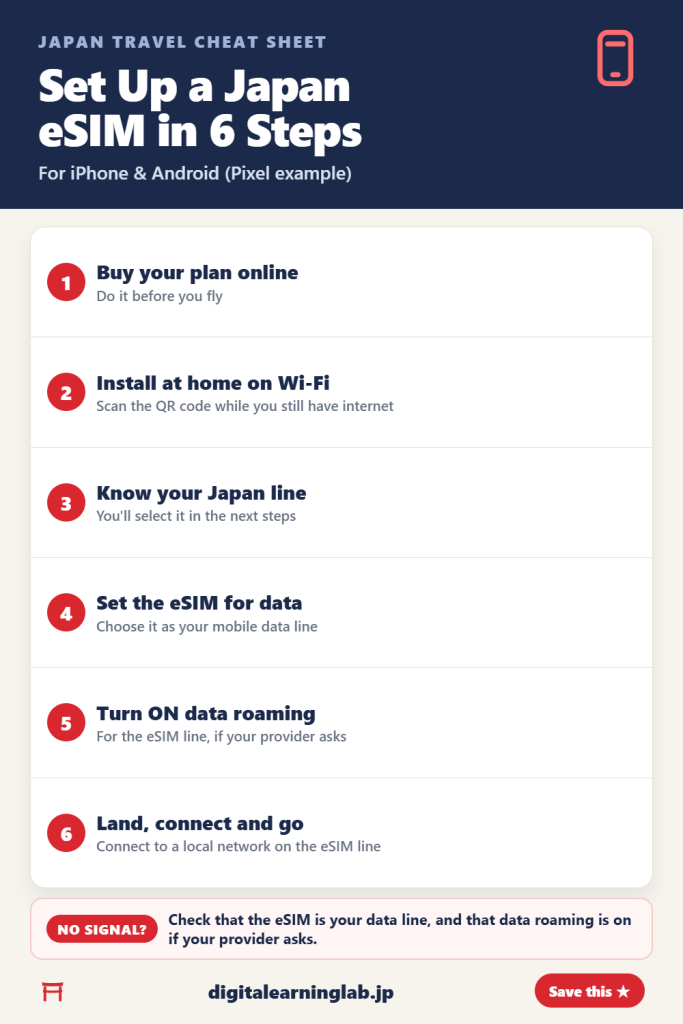
In a hurry? Here’s how to set up an eSIM for Japan:
- Buy your eSIM before you fly
- Install it at home on Wi-Fi
- Turn on data roaming for the eSIM line if your provider asks
- Connect to a local network when you land
An eSIM lets you get mobile data in Japan without swapping SIM cards or picking up and returning a device. If you’ve never used one, the setup can feel a little mysterious, but it only takes a few steps. This guide walks you through them on iPhone and on Android, using a Google Pixel as the example.
Not sure which eSIM to buy first? Start with our best eSIM for Japan comparison, then come back here to set it up.
Before you start: 3 quick checks
A few quick checks now can save you trouble later. Check these three things before you buy:
- Your phone supports eSIM. On iPhone, Apple lists the iPhone XS, XS Max, XR and later. On Android, support depends on the model, so check your phone maker’s eSIM information.
- Your phone is carrier-unlocked. A phone locked to your home carrier may reject a new eSIM. On an iPhone, go to Settings → General → About: next to Carrier Lock it should say “No SIM Restrictions”. Otherwise, ask your home provider before you travel.
- You have Wi-Fi for installation. You’ll install the eSIM at home before you fly, so you just need a stable Wi-Fi connection.
Step-by-step: how to set up an eSIM for Japan
Step 1 — Buy your eSIM plan online
Choose a provider and a Japan data plan that fits your trip length and usage, then buy it on their website or app. Providers deliver the eSIM digitally, for example as a QR code or through their app, so there’s nothing physical to wait for in the mail.
Step 2 — Install the eSIM (at home, on Wi-Fi)
This is where you add the eSIM to your phone. Do it before you fly. You can usually install it in one of these ways:
- In-app install: If your provider has an app, you can install the eSIM from there and follow the on-screen steps.
- QR code: On iPhone, scan it with the Camera app, tap the “Cellular Plan Detected” notification, then tap Add eSIM. On a Pixel, go to Settings → Network & internet → SIMs → Add SIM → Set up an eSIM and follow the steps.
- Manual entry: Some providers, such as Klook, also let you enter the details manually. On iPhone, that’s Settings → Cellular (called Mobile Data in some regions) → Add Cellular Plan → Enter Details Manually.
On Android, the steps can differ by phone, Android version and carrier, so check your phone maker’s or provider’s guide.
Step 3 — Know which line is your Japan eSIM
Apple notes that supported iPhone models can have two eSIMs active at the same time, one for your home number and one for the country you’re visiting. Keep track of which line is your Japan eSIM, because you’ll select it in the next two steps.
Step 4 — Set the eSIM for data (before or on arrival)
Tell your phone to use the eSIM for mobile data. On iPhone: Settings → Cellular (or Mobile Data) → Cellular Data → select your Japan eSIM line. Apple notes that if you use both lines, your travel eSIM will be used for data. On a Pixel: Settings → Network & internet → SIMs → Mobile data → choose the eSIM. Some plans, such as Ubigi’s Smartstart plans and Klook’s eSIMs, only start when you arrive. You can do this step right after you land, or earlier if your provider’s instructions say so.
Step 5 — Turn on data roaming for the eSIM line
Some travel eSIMs, such as Klook’s, ask you to switch on data roaming for the eSIM line when you arrive, so follow your provider’s steps. On iPhone: Settings → Cellular → tap your Japan eSIM line → Cellular Data Options → Data Roaming. On a Pixel, the Roaming setting is under Settings → Network & internet → SIMs. Apple also notes that you might still incur roaming fees from your home line, so check with your home carrier before you travel.
Step 6 — Land, connect, and go
When you arrive in Japan, your phone should connect to a local network on the eSIM line. Once you see signal and mobile data, you’re ready for maps, translation, train apps and messaging, without visiting a shop.
Troubleshooting: eSIM not working?
If you land and your eSIM isn’t connecting, here are some things to check:
- Is data roaming on for the eSIM line? If your provider asks for it, make sure it’s switched on.
- Is the eSIM set as your mobile data line? Double-check your data source is the Japan eSIM, not your home SIM.
- Restart your phone. It’s a simple thing to try.
- Toggle Airplane Mode on and off, then check again.
- Check when your plan starts. Some plans, such as Ubigi’s Smartstart plans and Klook’s eSIMs, only start when you arrive.
- Contact your provider. If nothing works, your eSIM provider can check your plan.
Frequently asked questions
Should I install the eSIM before or after I arrive?
Install it before you fly, at home on Wi-Fi. With some plans, installing early doesn’t start your plan: Ubigi’s Smartstart plans start when you arrive, and Klook’s start when the eSIM connects to an overseas network. Check your plan’s details.
Will I lose my normal phone number?
On supported iPhone models, you can keep it. According to Apple, you can have two eSIMs active at the same time, one for your home number and one for the country you’re visiting.
Can I set up the eSIM on an Android phone?
Yes, if your phone supports eSIM and isn’t locked to a carrier. On a Pixel, you add it under Settings → Network & internet → SIMs → Add SIM → Set up an eSIM, and choose the data SIM under Mobile data. On other Android phones, the steps can differ by phone, Android version and carrier, so check your phone maker’s or provider’s guide.
What if I run out of data?
Some providers let you add more data to your existing eSIM. Airalo says that in many cases you can top up instead of buying a new eSIM, and Klook says you can add data linked to your eSIM. Check your provider’s options before you buy.
Final thoughts
Setting up an eSIM for Japan comes down to a few steps: buy it, install it at home, set it for data, turn on roaming if your provider asks, and connect when you land. Do it before you fly and you’ll have one less thing to sort out at the airport. Next, make sure the rest of your arrival is smooth with our Narita & Haneda to Tokyo guide.